- Show results for
- Share
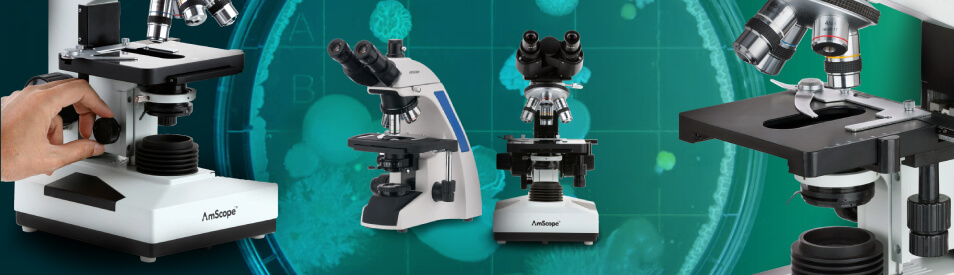
How to Use the AmScope Microscope Step by Step?
A microscope is used to magnify small objects. It can even help to observe objects at the cellular level, thus allowing you to study the shape of a cell, its nucleus, mitochondria, and other organelles.
Microscope Parts and Their Functions
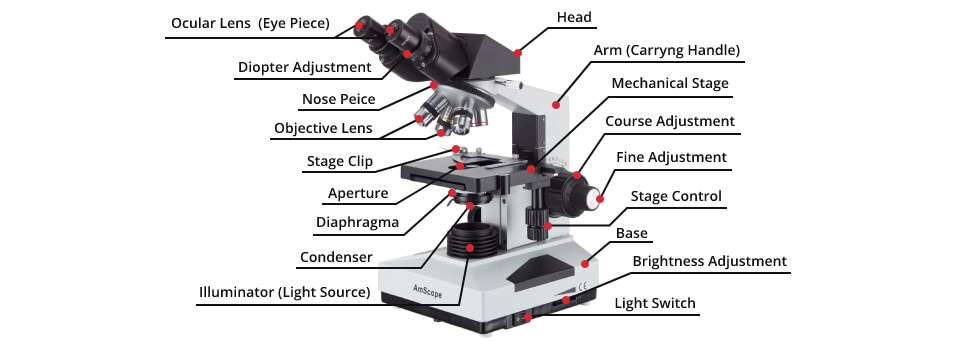
The eyepiece magnifies (increases) the image for the user; Nose Piece includes objective lenses. It twists to provide the user to change the type of the objective lenses; Objective lenses are divided into low-, medium, and high-power. They help the user to magnify the sample at different intensities; Stage Clip allows you to keep the slide on the stage; Aperture is a hole in a stage where the light passes through; Diaphragm regulates the light that passes through the sample; Illuminator works as a light source for the microscope while displaying the slide sample; Head - the top part of the microscope that holds the eyepiece and objective lens; Arm allows to carry the microscope; Coarse Adjustment allows the image to be focused at low power; Fine Adjustment is smaller than the coarse adjustment and is used for focusing the image while the medium- and high-power objective lenses are used; a Stage is a place where the slide sample is fixed; Base holds the microscope; LightSwitch provides light for the sample view.
How to Use the AmScope Microscope
Basic Rules of the Microscope Use
Step 1: Hold the microscope on the arm with one hand, and the base with the other when you carry it.
Step 2: Don’t remove the dust cover from the microscope when you use it. A microscope is accurate equipment, that is why any little damage or sharp movements may cause several problems with its work.
Step 3: Start and finish the microscope work with the low-power objective lens (usually it is 4x). It is the easiest way to focus and point the sample in the image on lower power. As it is the shortest objective lens, there is a minimum chance to scratch it with fixing or removing the slide sample from the stage.
Step 4: Turn on the microscope and fix the slide sample on the stage directly over the circle of light. Looking through the eyepiece will allow you to find the sample faster. Close one eye to the better sample vision, if you have a monocular microscope. If you have a binocular microscope, take the distance to the eyepieces for fast focusing and comfort viewing by sliding and twisting them till you can see the light with both eyes.
Step 5: If you use the lowest magnification object lens, focus the image by turning the coarse focus knob. If you can’t get the focus this way, turn the fine focus knob instead.
Step 6: Fix the diaphragm when you look through the eyepiece. The less the light is, the more detailed sample view you’ll get. Too much light will provide a washed-out vision.
Step 7: Center the sample in your spectrum of vision on a smaller magnification (it is usually 4x objective). After that, turn it to the higher magnification (10 z and then to 40x objective).
Step 8: Note that you should use only a fine focus knob on a higher power magnification to bring the image into focus. The fine focus knob is smaller than the coarse one, that is why it has a much shorter distance to the stage. The higher power objectives are placed very close to the slide sample, so when you use the coarse focus knob, you can scatch the lens and crack the slide.
Step 9: 100X objective is an oil immersion lens, so it should be used with extreme care. You may destroy the lens and get an unclear image of your sample while lubricating it without the oil. The oil will provide more light to see better through the lens and get a more focused image.
How to Make a Wet Mount and to Stain a Slide
Step 1: Take a thin piece of your sample. Too thick sample won’t be covered entirely and will the coverslip will be wobbled on top of the sample. On the picture below you may see the incorrect mounting of the coverslip that will provide a difficult image focus.

Step 2: Place one drop of water over the sample. Too much water will float the coverslip and the sample will be out of the field of view.
Step 3: The coverslip should be placed at a 45-degree angle to the slide, touching the waterdrop with one edge. Let the coverslip fall onto the specimen.

Step 4: Take and place one drop of Methylene Blue on one edge of the coverslip and place a flat edge of a piece of paper towel on the other edge. The paper towel takes the water out from under the coverslip on one side and the flow of the water will take the stain in under the coverslip from the other side.

Step 5: When the stain covers the area with the sample, you are done. If the stain doesn’t cover the needed area, you should repeat step 4 with a new piece of paper towel and more stain. Place the slide on a microscope stage.

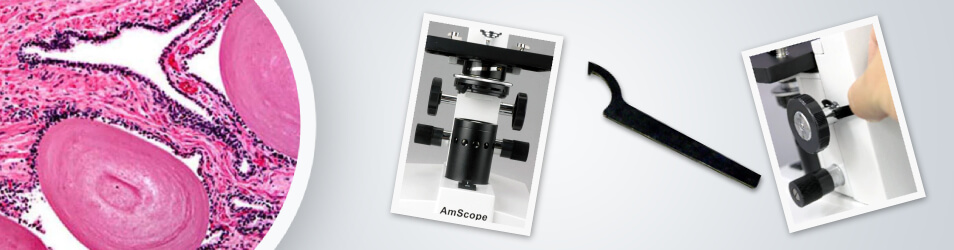
How to Set the Focus Tension
Basic (B100, M500 Style) Compound Microscope: To set the focusing tension, use the tool, which comes with most microscopes, shown below.
Stereo Zoom (SM & ZM) Microscopes:
On most SM and ZM microscopes, the tension system is located on the focusing rack rather than the head. The focusing rack's dual knobs need to be rotated in opposite directions to increase or decrease the tension in the system.
Advanced (600 & 800 Series) Compound Microscopes:
For the 680 & 800 series models, Use the wrench as it is shown below to loosen or tighten the focusing tension.
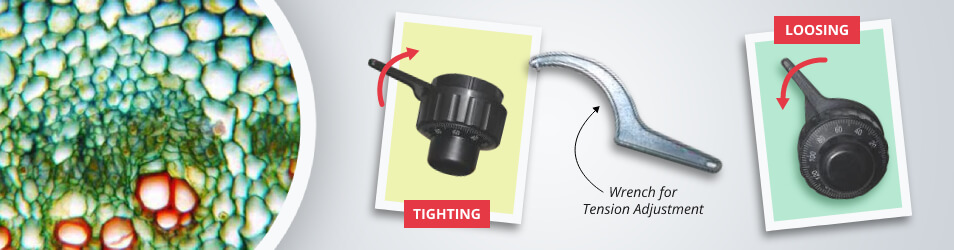
For the other compound microscope models (490 & up), you can use a ring on the inner section of the right-hand focusing knob. Turn the ring by your hand to increase or loosen the tension.
How to Change the Eyepiece and How to Install Color Filter
Use the smallest screwdriver to remove the small screw on the side of the eye tube to take the eyepiece out and change to the new one. Be sure that the screw is tightened, to prevent eyepiece damage when you turn the microscope upside down for any reason.
